Introducing Photo Collage Creator

I was playing with bitmap manipulations and so was born the idea to make this app. It was started some time ago, and, even if at times I was thinking it will never see the daylight, finally it was released!

Description of the app:
Photo Collage Creator is a simple app that lets you create beautiful collages within seconds and share them with your family, friends or colleagues. To create a collage you just need to select the photos, apply the frames, save, and you are done!

Features:
– Create collages composed from up to 5 photos
– Various frames to create a collage
– Shuffle the photos within the collage
– Save your collages
– Share collages on gmail, facebook, picasa, and other social networking sites.

Hope you will like it!

collage maker

photo collage creator android

application on android market

Using Maven to save the build time in a properties file

Create a folder called build in the root directory of the project, and a file build.properties with the following content:

build.time=@buildtime@

Using the maven replacer plugin we can replace the token @buildtime@ within the build.properties file with the build timestamp value, and then let the Android application read that value and use it.

 
<plugins>
     <plugin>
         <groupId>com.google.code.maven-replacer-plugin</groupId>
         <artifactId>replacer</artifactId>
         <version>1.5.2</version>
         <executions>
            <execution>
               <phase>validate</phase>
               <goals>
                  <goal>replace</goal>
               </goals>
            </execution>
         </executions>
         <configuration>
            <file>build/build.properties</file>
               <outputFile>res/raw/build.properties</outputFile>
               <replacements>
                  <replacement>
                     <token>@buildtime@</token>
                     <value>${maven.build.timestamp}</value>
                  </replacement>
               </replacements>
        </configuration>
   </plugin>
</plugin>

Run this task with mvn validate command. This will do nothing but replace the tokens from build.properties file with the timestamp value, and output the result to a new file in res/raw.

From here on the file can be accessed as a raw resource and read as a regular properties file.

Reading the properties file:

InputStream rawResource = resources.openRawResource(R.raw.build);
Properties properties = new Properties();
properties.load(rawResource);
String buildTime = properties.getProperty("build.time");

Android – [APP] Amazing Drunk Detection Scanner

Ready to go to party? Then don’t forget to put Amazing Drunk Detection Scanner in your pocket!

Drunk Detection Scanner is a simple application that helps you make fun with your friends. Make fun of your best friends by scanning their eye, and determine how drunk are they!

Here is how the prank works:
1. Just in the middle of the party open the Drunk Detection Scanner and say something like “Alright gentlemen, time to do some analysis!”
2. Invite one of your friends and tell him that this app will reveal how drunk he is.
3. Aim the camera close to your friend’s eye
4. Focus
5. Press “Start Scanning”
6. Wait till the result is calculated
7. Have fun!

DISCLAIMER:
Amazing Drunk Detection Scanner is a simple application designed for entertainment purposes only. It does not encourage the consumption of alcohol, and it does not take any legal responsibility.

android drunk detection scanner

How to create popups in Android

In this post I’ll show you how to create a popup window in Android. A popup window can be used to display an arbitrary view, and it can be very convenient in cases when you want to display an additional information, but don’t want or it’s not appropriate to launch a new activity or  display a dialog.

The final output should look like this:

Android Popup

We will use the PopupWindow class to create the popup.

One thing I would like to mention is that we want the popup to be attached to the button that opened it. For example if the “Show Popup” button from the screenshot above would be positioned in the middle of the screen, we want the popup window stick to the button’s position. To achieve this, first we should get the button’s “x” and “y” position on the screen, and pass them to the popup window. Then will we use an offset to align the popup properly – a bit to the right, and a bit down, so it won’t overlap the whole button.

Another think I would like to mention is that we will use a 9 patch background image for the popup, so it will look more fancy. But of course you can skip it and put any background you want, or no background at all.

9 patch image:

9 patch image

Put the image into res/drawable directory.


1. Create a new project in Eclipse:
Project: TestPopup
Activity: TestPopupActivity

2. Open layout/main.xml file and add a button


<?xml version="1.0" encoding="utf-8"?>
<LinearLayout xmlns:android="http://schemas.android.com/apk/res/android"
android:layout_width="fill_parent"
android:layout_height="fill_parent"
android:background="#CCC"
android:orientation="vertical" >

<Button
   android:id="@+id/show_popup"
   android:layout_width="wrap_content"
   android:layout_height="wrap_content"
   android:text="Show Popup" />

</LinearLayout>

3. Create a new layout file: layout/popup_layout.xml that defines the layout of popup.


<?xml version="1.0" encoding="utf-8"?>
<LinearLayout xmlns:android="http://schemas.android.com/apk/res/android"
   android:layout_width="wrap_content"
   android:id="@+id/popup"
   android:layout_height="wrap_content"
   android:background="@drawable/popup_bg"
   android:orientation="vertical" >

<TextView
   android:id="@+id/textView1"
   android:layout_width="wrap_content"
   android:layout_height="wrap_content"
   android:text="Popup"
   android:textAppearance="?android:attr/textAppearanceLarge" />

<TextView
   android:id="@+id/textView2"
   android:layout_marginTop="5dp"
   android:layout_width="wrap_content"
   android:layout_height="wrap_content"
   android:text="This is a simple popup" />

<Button
   android:id="@+id/close"
   android:layout_marginTop="10dp"
   android:layout_gravity="center_horizontal"
   android:layout_width="wrap_content"
   android:layout_height="wrap_content"
   android:text="Close" />

</LinearLayout>


4. And now the most interesting part. Open the TestPopupActivity and fill it with below code. Carefully read the comments to understand what’s going on.


public class TestPopupActivity extends Activity {

//The "x" and "y" position of the "Show Button" on screen.
Point p;

@Override
public void onCreate(Bundle savedInstanceState) {
   super.onCreate(savedInstanceState);
   setContentView(R.layout.main);

   Button btn_show = (Button) findViewById(R.id.show_popup);
   btn_show.setOnClickListener(new OnClickListener() {
     @Override
     public void onClick(View arg0) {

       //Open popup window
       if (p != null)
       showPopup(TestPopupActivity.this, p);
     }
   });
}

// Get the x and y position after the button is draw on screen
// (It's important to note that we can't get the position in the onCreate(),
// because at that stage most probably the view isn't drawn yet, so it will return (0, 0))
@Override
public void onWindowFocusChanged(boolean hasFocus) {

   int[] location = new int[2];
   Button button = (Button) findViewById(R.id.show_popup);

   // Get the x, y location and store it in the location[] array
   // location[0] = x, location[1] = y.
   button.getLocationOnScreen(location);

   //Initialize the Point with x, and y positions
   p = new Point();
   p.x = location[0];
   p.y = location[1];
}

// The method that displays the popup.
private void showPopup(final Activity context, Point p) {
   int popupWidth = 200;
   int popupHeight = 150;

   // Inflate the popup_layout.xml
   LinearLayout viewGroup = (LinearLayout) context.findViewById(R.id.popup);
   LayoutInflater layoutInflater = (LayoutInflater) context
     .getSystemService(Context.LAYOUT_INFLATER_SERVICE);
   View layout = layoutInflater.inflate(R.layout.popup_layout, viewGroup);

   // Creating the PopupWindow
   final PopupWindow popup = new PopupWindow(context);
   popup.setContentView(layout);
   popup.setWidth(popupWidth);
   popup.setHeight(popupHeight);
   popup.setFocusable(true);

   // Some offset to align the popup a bit to the right, and a bit down, relative to button's position.
   int OFFSET_X = 30;
   int OFFSET_Y = 30;

   // Clear the default translucent background
   popup.setBackgroundDrawable(new BitmapDrawable());

   // Displaying the popup at the specified location, + offsets.
   popup.showAtLocation(layout, Gravity.NO_GRAVITY, p.x + OFFSET_X, p.y + OFFSET_Y);

   // Getting a reference to Close button, and close the popup when clicked.
   Button close = (Button) layout.findViewById(R.id.close);
   close.setOnClickListener(new OnClickListener() {

     @Override
     public void onClick(View v) {
       popup.dismiss();
     }
   });
}
}

Introducing “Even or Odd” – My First Android Game :)

Hello everyone,

I would like to introduce you the freshly cooked “Even or Odd” game, an addictive casual game for Android.

The idea of the game is pretty simple: you are given a series of numbers, and have 30 seconds at your disposal to answer if the given numbers are even or odd ones. Give a correct answer and you get +100 points, you give a wrong answer and you go down: -100 points. Try to give as many correct answers as you can in 30 sec.

This is my first attempt into this kind of Android apps. What was new from what I did previously, is that I made use of MediaPlayer to play sounds. Using MediaPlayer to play sounds will be the subject of another tutorial in the upcoming period of time. Stay tuned. 😉

Android Game Even or Odd


First Android Android Game


Give it a try and let me know your high score :).

9GAG Pictures Funny Images

Creating and Displaying a Custom Dialog in Android

In this post I would like to describe the process of creating and displaying a custom dialog. Though the Android documentation describes pretty well the topic, I faced some problems implementing it, and I would like to share my findings.

The final output should look like this:

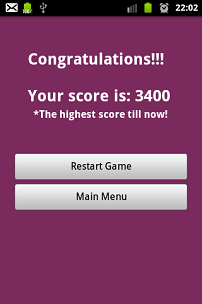
Android Custom Dialog

1. The first issue I have encountered was that I was getting a BadTokenException in the onCreateDialog() method where I was instantiating the Dialog: android.view.WindowManager$BadTokenException: Unable to add window — token null is not for an application, 

Context context=getApplicationContext();
Dialog dialog=new Dialog(context);

Well, though the Android documentation suggests to use getApplicationContext(); actually it turns out that this is not the proper way to do it and most likely it will throw an exception. The correct way is to use this, or “ActivityName”.this instead of getApplicationContext(). For example:

Context context=MainActivity.this;
Dialog dialog=new Dialog(context);


2. The second issue I was facing was that I wanted to get rid off the standard dialog title.
Normally you would set the Dialog title with this:

dialog.setTitle("Dialog Title");

However, if you don’t want to display a standard title for your dialog, not calling the above line most probably won’t meet your expectations, because it will leave an empty space where the title should be.

Hopefully, this is an easy fix. Just call requestWindowFeature(Window.FEATURE_NO_TITLE); and you are done.

dialog.requestWindowFeature(Window.FEATURE_NO_TITLE);


To sum up with a concrete working example, below I presented an implementation of a simple custom dialog.

custom_dialog.xml:

<?xml version="1.0" encoding="utf-8"?>
<LinearLayout xmlns:android="http://schemas.android.com/apk/res/android"
   android:layout_width="250dp"
   android:layout_height="match_parent"
   android:background="#8F1A3B"
   android:orientation="vertical" >

<TextView
   android:layout_width="fill_parent"
   android:layout_height="wrap_content"
   android:layout_marginBottom="20dp"
   android:text="Custom Dialog"
   android:textSize="18dp" />

<Button
   android:id="@+id/restart"
   android:layout_width="fill_parent"
   android:layout_height="wrap_content"
   android:text="Restart Game" />

</LinearLayout>


MainActivity:


public class MainActivity extends Activity {

Dialog dialog;
int DIALOG_GAME_RESTART=100;

@Override
public void onCreate(Bundle savedInstanceState) {
   // ............
}

@Override
protected Dialog onCreateDialog(int id) {
   switch (id) {
   case DIALOG_GAME_RESTART:
     Context context=MainActivity.this;
     dialog=new Dialog(context);
     dialog.requestWindowFeature(Window.FEATURE_NO_TITLE);

     dialog.setContentView(R.layout.custom_dialog);

     Button restart=(Button)dialog.findViewById(R.id.restart);

     restart.setOnClickListener(new OnClickListener() {
     @Override
     public void onClick(View v) {
        dialog.dismiss();

        //whatever code you want to execute on restart
     }
     });
   break;

   default: break;
   }
   return dialog;
}
}

GAG Pictures – Have Fun! Spread The Fun!

9gag picturesHello everyone, I would like to introduce you my second Android application published on Google Play  – GAG Pictures. Compared with the first one, this application is intended to bring you much fun.

GAG Pictures is your daily set of funny images! Every time the application is launched it downloads a set of new funny images from the famous site 9gag.com. Every image has a Share button so you can share that hilarious image with your friends. The current version allows you to share only the direct link to image, but in the upcoming releases the ability to send the image itself will be provided.

9gag funny image

Have fun! 🙂

Get it on Google Play - GAG Pictures

Parsing XML with XmlPullParser

XmlPullParser is an interface that provides parsing functionality. The below code is an example of XmlPullParser usage.

We will parse the Youtube feed that contains the most highly rated YouTube video, looking for “<title>” tag and extracting the text inside.

URL Feed: https://gdata.youtube.com/feeds/api/standardfeeds/top_rated


//We will put the data into a StringBuilder
StringBuilder builder=new StringBuilder();

URL url = new URL("https://gdata.youtube.com/feeds/api/standardfeeds/top_rated");

XmlPullParserFactory factory=XmlPullParserFactory.newInstance();
factory.setNamespaceAware(true);
XmlPullParser xpp=factory.newPullParser();

xpp.setInput(getInputStream(url), "UTF_8");

int eventType=xpp.getEventType();
while(eventType!=XmlPullParser.END_DOCUMENT){
  // Looking for a start tag
  if(eventType==XmlPullParser.START_TAG){
    //We look for "title" tag in XML response
    if(xpp.getName().equalsIgnoreCase("title")){
      //Once we found the "title" tag, add the text it contains to our builder
      builder.append(xpp.nextText()+"\n");
    }
  }

  eventType=xpp.next();
}

And here’s the implementation of getInputStream() method:

public InputStream getInputStream(URL url) {
  try {
    return url.openConnection().getInputStream();
  } catch (IOException e) {
    return null;
  }
}