Example usage of AppCompatActivity in Android

The latest release of android support library, 22.1, deprecates the ActionBarActivity in favor of AppCompatActivity, which promises to bring a single consistent ActionBar for all devices starting with API Level 7 and above.
Also, the new update adds the ability to tint widgets automatically when using AppCompat, and adds support for consistent material design dialogs. Use support.v7.app.AlertDialog (instead of android.app.AlertDialog), to get nice looking material dialogs across multiple versions of devices.

android-support-22.1

Example:
1. In order to benefit from all these things, the first thing you should do is to update the support library to 22.1.0.

dependencies {
   // … 
   compile 'com.android.support:appcompat-v7:22.1.0'
}
2. Then let your activity extend AppCompatActivity.
public class MainActivity extends AppCompatActivity {
  // ...
}
3. And finally, change the application theme to AppCompat or any descendants of it.
<application android:theme="@style/Theme.AppCompat">
Configuring the material color palette

Following the steps above will setup the application with the default theme, but the actionbar can be styled further by specifying the material color palette:

<style name="AppTheme" parent="Theme.AppCompat">
   <item name="colorPrimary">@color/primary</item>
   <item name="colorPrimaryDark">@color/primaryDark</item>
   <item name="colorAccent">@color/accent</item>
</style>

and then update your application theme to use AppTheme.

<application android:theme="@style/AppTheme">

Introduction to Android Espresso

Espresso is a testing framework that exposes a simple API to perform UI testing of android apps. With the latest 2.0 release, Espresso is now part of the Android Support Repository which makes it more easier to add automated testing support for your project.

But before jumping into Espresso API, lets consider what puts it apart from the other testing frameworks.

  • One of the first things you’ll notice about Espresso, is that its code looks a lot like English, which makes it predictable and easy to learn.
  • The API is relatively small, and yet open for customization.
  • Espresso tests run optimally fast (no waits, sleeps)
  • Gradle + Android Studio support

Adding Espresso to your project

1. First of all make sure you have Android Support Repository installed

android sdk manager

2. Add the following dependencies to your application build.gradle file

dependencies {
   androidTestCompile 'com.android.support.test:testing-support-lib:0.1'
   androidTestCompile 'com.android.support.test.espresso:espresso-core:2.0'
}

3. Finally, specify the test instrumentation runner in default config

android {

    defaultConfig {
        // ....
        testInstrumentationRunner "android.support.test.runner.AndroidJUnitRunner"
    }
}

And that is basically what it takes “to invite your project to a cup of Espresso”!

The main components of Espresso

Espresso is built up from 3 major components.

These components are:

  • ViewMatchers – allows you to locate a view in the current view hierarchy
  • ViewActions – allows you to interact with views
  • ViewAssertions – allows you to assert the state of a view.

For simplicity, you may use these shortcuts to refer to them:

  • ViewMatchers – “find something
  • ViewActions – “do something
  • ViewAssertions – “check something

And, for example when you will need to check something (like, is some text displayed on the screen?), you’ll know you’ll need a ViewAssertion for that.

Below is an example of a test in Espresso, and where the main components find their place.

Android Espresso main components

A simple test using onView()

Suppose we have an app where the user is asked to enter his name.
After he enters the name, he taps on the “Next” button and is redirected to another activity where a greeting message is displayed.

espresso simple test

If we would write a test for this scenario, then it might look something like this:

// locate the view with id "user_name" and type the text "John"
onView(withId(R.id.user_name)).perform(typeText("John"));

// locate the view with id "next" and click on it
onView(withId(R.id.next)).perform(click());

// locate the view with id "greeting_message" and check its text is equal with "Hello John!"
onView(withId(R.id.greeting_message)).check(matches(withText("Hello John!")));

Notice that we don’t specify explicitly what kind of view we are interacting with (eg.: EditText, Button), we simply say that we are looking for a view with a specific id.
Also, when clicking on the “Next” button and later checking the text, we don’t have to write some special code to tell Espresso that we have navigated to another activity.

Now, if we want to actually run this test, then it should be put in a class. In Gradle, the location where tests are stored is: yourApp/src/androidTest/java.

This is an example of a test class, and its main characteristics:

Espresso example test class

A simple test using onData()

Whenever you have a ListView, GridView, Spinner, and other Adapter based views, you’ll have to use onData() in order to interact with an item from that list.
onData() is targeting directly the data provided by your adapter. What does this mean, we will see in a moment.

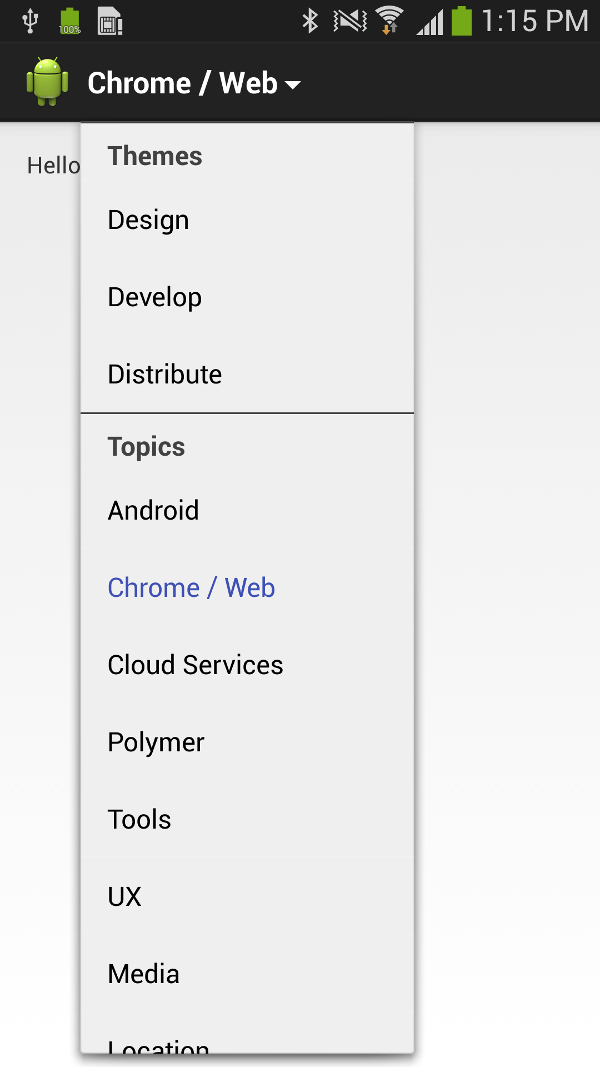
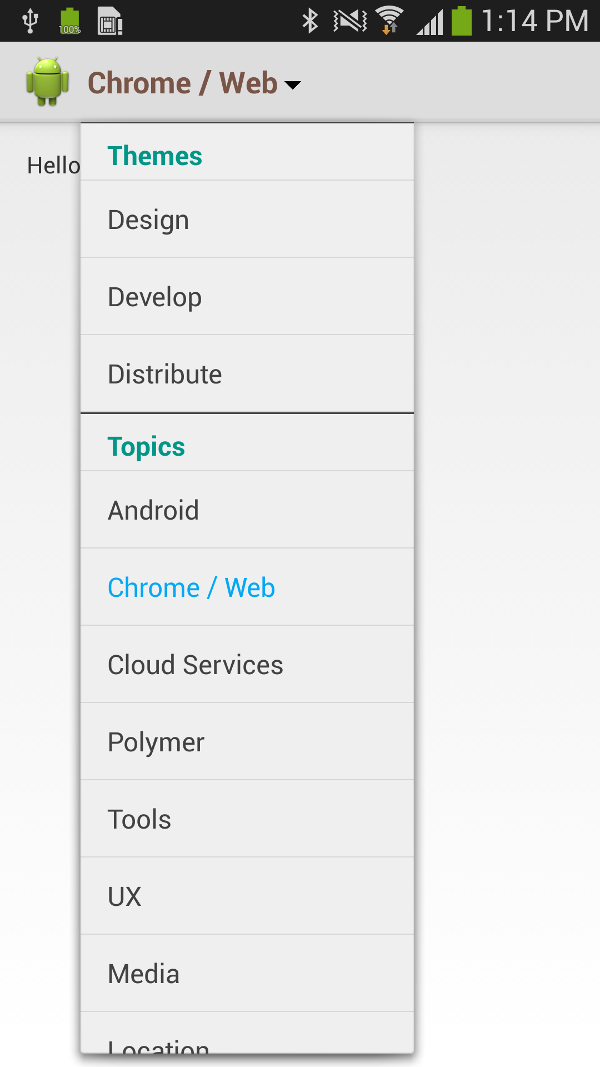
In a hypothetical application we are asked to select a country from a Spinner, once selected, the country is displayed next to the Spinner.

espresso on data

A test to check that the displayed country is equal with what was selected, might look like this:

// locate the view with id "country_spinner" and click on it
onView(withId(R.id.country_spinner)).perform(click());

// match an item that is a String and is equal with whatever value the COUNTRY constant is initialized, then click on it.
onData(allOf(is(instanceOf(String.class)), is(COUNTRY))).perform(click());

// locate the view with id "selected_country" and check its text is equal with COUNTRY
onView(withId(R.id.selected_country)).check(matches(withText("selected: " + COUNTRY)));

The Spinner you saw in the example above is backed by a simple array of strings, and because of this, we specify that we are looking for an item of type String. If, instead of a String, it were some custom object, then we would specify that instead.
To illustrate, consider the following example where a list of books is displayed:

books-adapter

Since the items in the adapter are of type Book, so will look the query:

onData(allOf(is(instanceOf(Book.class)), withBookTitle(BOOK_TITLE))).perform(click());

DataInteractions

Espresso has a few useful methods that can be used to interact with data.

atPosition() – Might be useful when the element to interact with is not relevant, or when the items always appear in a specific order, so you know every item on what position sits.

onData(...).atPosition(2).perform(click());

inRoot() – Use inRoot() to target non-default windows. One scenario where this can be used is when testing autocomplete. The list that appears in the autocomplete view belongs to a window that is drawn on top of application window.
In this case you have to specify that the data you are looking for, is not in the main window.

onView(withText("AutoCompleteText"))
        .inRoot(withDecorView(not(is(getActivity().getWindow().getDecorView()))))
        .check(matches(isDisplayed()));

onChildView() – This DataInteraction allows to further refine the query by letting you interact with a specific view from a list row.
Let say that you have a list of items and every item has a delete button. You want to click on Delete button of a specific item:

onData(withBookTitle("My Book"))
      .onChildView(withId(R.id.book_delete)).perform(click());

inAdapterView() – This allows to select a particular adapter view to operate on, by default Espresso operates on any adapter view.
You may find this useful when dealing with ViewPagers and Fragments, and you want to interact with the AdapterView that is currently displayed, or when you have more than one adapter view in your activity.

onData(withBookTitle("My Book"))
      .inAdapterView(allOf(isAssignableFrom(AdapterView.class), isDisplayed()))
      .perform(click());

Espresso and RecyclerView

RecyclerView is an UI component designed to render a collection of data just like ListView and GridView, actually, it is intended to be a replacement of these two. What interests us from a testing point of view, is that a RecyclerView is no longer an AdapterView. This means that you can not use onData() to interact with list items.

Fortunately, there is a class called RecyclerViewActions that exposes a small API to operate on a RecyclerView. RecyclerViewActions is part of a separate lib called espresso-contrib, that also should be added to build.gradle:

dependencies {
    // ...

    androidTestCompile('com.android.support.test.espresso:espresso-contrib:2.0');
}

Since your project already includes a dependency to recyclerview, and might as well include support libs, some dependencies conflicts might appear. In this case exclude
them from espresso-contrib like this:

dependencies {
    // ...

    androidTestCompile('com.android.support.test.espresso:espresso-contrib:2.0') {
        exclude group: 'com.android.support', module: 'appcompat'
        exclude group: 'com.android.support', module: 'support-v4'
        exclude module: 'recyclerview-v7'
    }
}

Here is how to click on an item from the list by position:

onView(withId(R.id.recyclerView))
      .perform(RecyclerViewActions.actionOnItemAtPosition(0, click()));

Or how to perform a click on a View from an item:

onView(withId(R.id.recyclerView))
      .perform(RecyclerViewActions.actionOnItem(
                hasDescendant(withText(BOOK_TITLE)), click()));

More Espresso Examples on Github:
https://github.com/vgrec/EspressoExamples

Introducing SectionedActionBarList

This Android library allows you to replace the drop down navigation list with a custom list where the items in the list are grouped by sections. It was inspired from the Google I/O 2014 app how sessions are grouped in the ActionBar list.

While the new Material Design movement discourages the use of ActionBar lists, in some situations it can be the best available option.

At the moment the library is not available on a repository, you have to include it as a source library in your project, but that will be fixed soon.

Github project page: https://github.com/vgrec/SectionedActionBarList

Example
List
<Section> sections = new ArrayList
<Section>();
 
Section themes = new Section("Themes");
themes.add("Design");
themes.add("Develop");
themes.add("Distribute");
sections.add(themes);
 
Section topics = new Section("Topics");
topics.add("Android");
topics.add("Chrome / Web");
topics.add("Cloud Services");
topics.add("Media");
topics.add("Location");
topics.add("Performance");
sections.add(topics);
 
Section types = new Section("Types");
types.add("Sessions");
types.add("App Reviews");
types.add("Box Talks");
sections.add(topics);
 
SectionedActionBarList actionBarList = new SectionedActionBarList(this).from(sections);
actionBarList.setItemSelectedListener(new ItemSelectedListener() {
  @Override
  public void onItemSelected(AdapterView<?> parent, View view, int position, long id, String sectionName, String itemName) {
      Toast.makeText(MainActivity.this, "Section: " + sectionName + ", Item: " + itemName, Toast.LENGTH_LONG).show();
  }
});

The SectionedActionBarList accepts a list of sections List<Section> sections, and every Section has a name and some associated items.

sectioned actionbar list

Configuration

Small customizations can be done to fit with your application design:

ListConfiguration configuration = new ListConfiguration(this);
configuration.setActionBarItemColorResource(R.color.brown);
configuration.setIndicatorDrawableResource(R.drawable.spinner_indicator_dark);
configuration.setSectionTitleColorResource(R.color.teal);
configuration.setDropdownItemColorResources(R.color.light_blue, R.color.dark_grey);

SectionedActionBarSpinner actionBarSpinner = new SectionedActionBarSpinner(this, configuration).from(sections);
// ....

actionbar list

Thanks to Webucator, a provider of Android classes, for producing the below video illustrating the integration of the SectionedActionbarList.


Speed up creation of parcelable classes with AutoParcel

When the time comes to send a custom object to an activity or to persist it across configuration changes, we all know that we can use either Serializable or Parcelable interfaces. And probably you have heard that Parcelable is the recommended way to do it on Android, because it is much much faster than Serializable (10x times and more, check this article for a detailed comparition between Serializable and Parcelable http://www.developerphil.com/parcelable-vs-serializable/)
However, using Serializable still is more attractive than using Parcelable, because it is simpler. The only thing you have to do is to let your class implement Serializable and you are done, while implementing Parcelable requires you to write a lot of boilerplate code which slows you down.

Fortunately, AutoParcel, a Parcelable generation library, is here to help you and speed up creation of Parcelable classes.

With gradle the integration is easy:
parent build.gradle

buildscript {
   repositories {
       jcenter()
   }

    dependencies {
        classpath 'com.android.tools.build:gradle:0.13.2'
        classpath 'com.neenbedankt.gradle.plugins:android-apt:+'

        // NOTE: Do not place your application dependencies here; they belong
        // in the individual module build.gradle files
    }
}
// ...

module build.gradle

apply plugin: 'android-apt'

// ...

dependencies {
   apt 'com.github.frankiesardo:auto-parcel-processor:+'
   compile 'com.github.frankiesardo:auto-parcel:+'
}
Example:
@AutoParcel
public abstract class Book implements Parcelable {
   public abstract String getTitle();

   public abstract String getDescription();

   public static Book create(String title, String description) {
      return new AutoParcel_Book(title, description);
   }
}

Key points:
– your class should be annotated with @AutoParcel
– should be abstract and implement Parcelable
– no fields, just abstract getter methods
– have a method that takes all classes parameters and returns an instance of AutoParcel_<YourModelClass>

Don’t worry if the IDE complains that it cannot find AutoParcel_Book, just hit run and the compilation error should auto resolve.

And the usage is:

Book book = Book.create(bookTitle, bookDescription);

Another feature of AutoParcel that you may find useful, is that unlike regular Parcelable classes, you can have a custom object as a member of an AutoParcel class, without having that object to implement Parcelable.

@AutoParcel
abstract public class Book implements Parcelable {
   public abstract String getTitle();

   public abstract String getDescription();

   public abstract Author getAuthor();

   public static Book create(String title, String description, Author author) {
      return new AutoParcel_Book(title, description, author);
   }
}

The Author class is not required to implement Parcelable:

public class Author {
   private String name;
   
   public String getName() {
       return name;
   }

   public void setName(String name) {
      this.name = name;
   }
}

Analysing Android code with SonarQube

sonar analysis

SonarQube, formerly known as Sonar, is a platform to analyze code quality. Analysis covers such aspects as code duplications, potential bugs, coding rules, complexity, unit tests, comments, and architecture & design.
It supports supports more than 20 programming languages and has a reach set of useful plugins that gives you the opportunity to inspect different aspects of the code.

What is caracteristic about SonarQube is that it comes as a platform in the form of a web application. This means that the results of the analysis will be displayed in a web page.

Installing SonarQube

The installation is pretty straightforward, you have just to download an archive and extract it in a folder of your choice.
1. Go to http://www.sonarqube.org/downloads/ and download the latest release.
2. Unzip the archive

Starting SonarQube

1. Go to sonarqube-4.3/bin (or whatever version you downloaded)
2. Open a corresponding folder according to your operating system (linux-x86-64 in my case). There you should see a file called sonar.sh (or StartSonar.bat for Windows)
3. Open up a terminal window and execute: sonar.sh start (or just double click StartSonar.bat on windows). This command will start sonar listening on localhost:9000.
4. Open a browser and enter localhost:9000. The sonar web page should open.
Note that it may take some time until sonar loads, so if you get “page not found” in your browser, try to refresh the page later.

Installing SonarQube Runner

There are several ways to analyse the source code and in this tutorial we will choose to analyse with SonarQube Runner, recommended as the default launcher to analyze a project.

1. Once again go to http://www.sonarqube.org/downloads/ and download SonarQube Runner
2. Extract the downloaded archive into a directory of your choise, which we will refer as: <install_directory>
3. Update global settings by editing: <install_directory>/conf/sonar-runner.properties (if you are running sonar on localhost, like in this tutorial, you don’t have to modify any settings):

#----- Default SonarQube server
#sonar.host.url=http://localhost:9000

#----- PostgreSQL
#sonar.jdbc.url=jdbc:postgresql://localhost/sonar

#----- MySQL
#sonar.jdbc.url=jdbc:mysql://localhost:3306/sonar?useUnicode=true&characterEncoding=utf8

#----- Oracle
#sonar.jdbc.url=jdbc:oracle:thin:@localhost/XE

#----- Oracle
#sonar.jdbc.url=jdbc:oracle:thin:@localhost/XE

#----- Microsoft SQLServer
#sonar.jdbc.url=jdbc:jtds:sqlserver://localhost/sonar;SelectMethod=Cursor

#----- Global database settings
#sonar.jdbc.username=sonar
#sonar.jdbc.password=sonar

4. Create a new SONAR_RUNNER_HOME environment variable set to <install_directory>, so that you could invoke sonar runner from any location.
5. Add the <install_directory>/bin directory to your path.

To check that sonar runner was installed properly, open a terminal window and execute sonar-runner -h.

You should get a message like this:

usage: sonar-runner [options]

Options:
-D,--define Define property
-e,--errors Produce execution error messages
-h,--help Display help information
-v,--version Display version information
-X,--debug Produce execution debug output

Analysing source code of a project

Once the sonar runner is properly installed, we can proceed to code analysis.

1. Navigate to the root directory of your project and create a file called sonar-project.properties, which will specify the project settings such as the code source directory, language used, and the project name:

sonar.projectKey=myproject
sonar.projectName=My Project
sonar.projectVersion=1.0

sonar.sources=src
sonar.language=java
sonar.sourceEncoding=UTF-8

Note: for Android Studio, which follows the gradle directory structure, set the sourses as:

sonar.sources=src/main/java

2. Run sonar-runner command to start the analysis.
3. Once the analysis complets, head to localhost:9000 to see the results for your project.

Removing a project from SonarQube

First login as an administrator, admin/admin default username and password.

1. Go to your project dashboard
2. In the top right corner click on Configuration -> Deletion -> Delete Project

delete-shonar-project

Introducing Photo Collage Creator

I was playing with bitmap manipulations and so was born the idea to make this app. It was started some time ago, and, even if at times I was thinking it will never see the daylight, finally it was released!

Description of the app:
Photo Collage Creator is a simple app that lets you create beautiful collages within seconds and share them with your family, friends or colleagues. To create a collage you just need to select the photos, apply the frames, save, and you are done!

Features:
– Create collages composed from up to 5 photos
– Various frames to create a collage
– Shuffle the photos within the collage
– Save your collages
– Share collages on gmail, facebook, picasa, and other social networking sites.

Hope you will like it!

collage maker

photo collage creator android

application on android market

Android Volley Tutorial

Volley is an android library released by Google that can make your life easier when dealing with network operations. In this blog post I will mention the main features of the library and show a few example usages, in particular, how to make a request, how to download images, and how to use the cache.

Features of Volley library

a) Automatically schedules the network requests

b) Supports request prioritization. This means that you can load content depending of priorities, for example the main content could have a high priority, but the images a low priority.

c) Provides transparent disk and memory cache that allows for quick reloading of data. Transparent cache means that the caller doesn’t have to know about the existence of the cache. That is, the cache is implemented automatically. You do, however, have the possibility to disable the caching.

d) Provides a good API for canceling requests. You can cancel a single request, or cancel requests depending on some filters.

Besides the great features that Volley comes with, you don’t have to use it for everything. Volley is great for RPC-style network operations that populate UI, a typical example would be loading thumbnail images into a ListView, but not very good for streaming operations like downloading a video or mp3.

Getting started with Volley

1. Clone the Volley project:
git clone https://android.googlesource.com/platform/frameworks/volley
2. Import the library into your project

The most frequent classes of Volley that you will work with are RequestQueue and Request, and ImageLoader when dealing with images loading.

RequestQueue is used for dispatching requests to the network. It is recommended to create it early and use it as a Singleton.
Request is the base class for creating network requests (GET, POST).
ImageLoader is a helper class that handles loading and caching images from remote URLs.

Step 1: VolleySingleton.java

As recommended, lets create first a Singleton class that will return on demand an instance of RequestQueue and one of ImageLoader.

public class VolleySingleton {

    private static VolleySingleton instance;
    private RequestQueue requestQueue;
    private ImageLoader imageLoader;

    private VolleySingleton(Context context) {
        requestQueue = Volley.newRequestQueue(context);

        imageLoader = new ImageLoader(requestQueue, new ImageLoader.ImageCache() {
            private final LruCache<String, Bitmap> cache = new LruCache<String, Bitmap>(20);


            @Override
            public Bitmap getBitmap(String url) {
                return cache.get(url);
            }

            @Override
            public void putBitmap(String url, Bitmap bitmap) {
                cache.put(url, bitmap);
            }
        });
    }


    public static VolleySingleton getInstance(Context context) {
        if (instance == null) {
            instance = new VolleySingleton(context);
        }
        return instance;
    }

    public RequestQueue getRequestQueue() {
        return requestQueue;
    }

    public ImageLoader getImageLoader() {
        return imageLoader;
    }
}
Step 2: Add internet permission
<uses-permission android:name="android.permission.INTERNET" /> 
Step 3: Create an instance of RequestQueue
RequestQueue queue = VolleySingleton.getInstance(this).getRequestQueue();
Step 4: Create the request

Volley comes with a class called JsonRequest that you can use to make requests to a server that returns a json response.
However, in this example we will query an RSS feed which returns a response in XML format. Volley does not include a similar class for handling xml responses, like JsonRequest, but it has StringRequest class that can be used to retrieve the response body as a String.

There are two ways to construct a StringRequest:

StringRequest(int method, String url, Listener<String> listener,
            ErrorListener errorListener)

or

StringRequest(String url, Listener<String> listener, ErrorListener errorListener)

The second constructor does not take the request method as a parameter, when not specified, a GET request is created.

Listener is a callback interface for delivering the result, and
ErrorListener is a callback interface for delivering error responses.

Example:

String url = "http://www.pcworld.com/index.rss";
StringRequest request = new StringRequest(url, new Listener<String>() {

            @Override
            public void onResponse(String response) {
                // we got the response, now our job is to handle it 
                parseXmlResponse(response); 
            }
        }, new ErrorListener() {

            @Override
            public void onErrorResponse(VolleyError error) {
               //something happened, treat the error.
            }
        });
Step 6: Execute the request
queue.add(request);

And that is all! The execution of the request implies its addition to the RequestQueue.

Step 7: Loading thumbnail images

Loading images can be done easy if you replace the android’s ImageView with Volley’s NetworkImageView:

<com.android.volley.toolbox.NetworkImageView
        android:id="@+id/icon"
        android:layout_width="80dp"
        android:layout_height="80dp"
        android:src="@drawable/default_placeholder" />

then use setImageUrl() and you are done!

String url = "..."; // URL of the image
ImageView imageView = (ImageView)view.findViewById(R.id.image);
ImageLoader imageLoader = VolleySingleton.getImageLoader(); 
imageView.setImageUrl(url, imageLoader); 

If, for some reason, you don’t want or can’t use NetworkImageView, then there’s an alternate method.
You can use the get() method of ImageLoader class which accepts the image url and an instance of ImageListener:

ImageLoader imageLoader = VolleySingleton.getImageLoader(); 
imageLoader.get(url, new ImageListener() {
             
            public void onErrorResponse(VolleyError error) {
                imageView.setImageResource(R.drawable.icon_error); // set an error image if the download fails
            }
             
            public void onResponse(ImageContainer response, boolean arg1) {
                if (response.getBitmap() != null) {
                    imageView.setImageBitmap(response.getBitmap());
                } 
            }
        });
Reading from cache

One of the Volley’s features is that it provides transparent disk and memory cache. The cache is implemented automatically for classes that extends Request, such as JsonRequest and StringRequest.

To read the cache:

Entry entry = queue.getCache().get(url);
if(entry!=null){
     String data = new String(entry.data, "UTF-8");
     // process data
}

To turn off the cache:

request.setShouldCache(false);

to remove the cache for a specific request:

queue.getCache().remove(url);

to clear all cache:

queue.getCache().clear();

to invalidate the cache: this will allow to display the cached data until the response is received. When the response is received, it will automatically override the cached data.

queue.getCache().invalidate(url, true);

For more details about Volley you can watch the full video at: https://developers.google.com/events/io/sessions/325304728

Google Maps API V2 Android Tutorial

In this tutorial we will walk through the process of integrating Google Maps API V2 into an Android project.

(Source code available on GitHub)

Android Google Maps API V2

The necessary steps in order to integrate the Google Maps V2 are :

1. Install Google Play services

The version 2 of Google Maps now is part of the Google Play services SDK, that is why google-play-services lib should be installed first.

Start the Android SDK Manager and choose to install Google Play services from the Extras category:
android sdk manager

After the sdk manager completes the installation, go to <android_sdk_folder>/extras/google/google_play_services/libproject and copy the google-play-services_lib to the location where you maintain your Android projects.

Then import the library project into your workspace, and reference it in your Android project.

2. Get the Google Maps API Key

In order to use Google Maps API in your project you need a valid Google Maps API key. The key can be obtained via the Google APIs Console. You will have to provide the SHA-1 fingerprint and the package name of your application.

Please note that if you already hold a map key from the Google Maps Android V1, also known as MapView, you still will need get a new API key, as the old key won’t work with the V2 API.

2.1 Generate SHA-1 certificate fingerprint

To display the SHA-1 fingerprint, first you need to decide for what type of certificate do you need to generate the fingerprint: for the debug certificate, or for the release certificate.
In this example we well consider displaying the fingerprint for the debug certificate.

The file name of debug certificate is called debug.keystore, and it is located on C:\Users\your_user_name\.android\ on Windows, and on ~/.android/ on Linux.

If you are on a Linux, open the terminal and run the following command:
keytool -list -v -keystore ~/.android/debug.keystore -alias androiddebugkey -storepass android -keypass android

If you are on a Windows, open the command prompt and run this:
keytool -list -v -keystore "%USERPROFILE%\.android\debug.keystore" -alias androiddebugkey -storepass android -keypass android

Copy the SHA1 fingerprint and store it somewhere for later use.
android sha1 certificate fingerprint

(Note that if the command prompt complains that keytool is not a recognizable command, you can find it your java JDK/bin folder. cd there and run the command from that folder.)

2.2 Create an API Project

Navigate to Google APIs Console and create a new project, if you haven’t used Google APIs Console before. Then click on the Services link from the left menu:
google services

and from the presented list of of services toggle Google Maps Android API V2:
google maps android api v2

(Please make sure you namely select “Google Maps Android API V2”, not Google Maps API v2, nor Google Maps API v3)

2.3 Obtain an API Key

a) From the left menu click on API Access
b) Then click on Create New Android Key
c) In the resulting dialog, enter the SHA-1 fingerprint, followed by a semicolon, and then your application package name.
For example:
95:F7:64:E9:3D:D44:70:EF:CB:F9:D9:14:BF:72:88:B4:E8:D7:11:E9;com.example.mapsv2

As a result the page displays a new section entitled Key for Android apps (with certificates), followed by your API key that looks something like this:
AIzaZyAcQKLEyHsamGpNLHdn8wd5-wuCqBnJ3Rk

2.4 Add the API key to AndroidManifest file

Open the AndroidManifest file and add the following element as a child of application tag:

<meta-data
    android:name="com.google.android.maps.v2.API_KEY"
    android:value="YOUR_API_KEY"/>

replacing the YOUR_API_KEY with your real API key.

3. Update the AndroidManifest file with other settings

In order to use Google Maps Android API we need to declare a few permissions and specify that the application requires OpenGL ES version 2:

<manifest xmlns:android="http://schemas.android.com/apk/res/android"
    //... >

    <uses-feature
        android:glEsVersion="0x00020000"
        android:required="true" />

    <uses-permission android:name="android.permission.INTERNET" />
    <uses-permission android:name="android.permission.ACCESS_NETWORK_STATE" />
    <uses-permission android:name="android.permission.WRITE_EXTERNAL_STORAGE" />
    <uses-permission android:name="com.google.android.providers.gsf.permission.READ_GSERVICES" />
    <uses-permission android:name="android.permission.ACCESS_COARSE_LOCATION" />
    <uses-permission android:name="android.permission.ACCESS_FINE_LOCATION" />
    
    //...
</manifest>
4. Display a MapFragment

Displaying the maps is as simple as declaring a fragment in the xml layout with the name com.google.android.gms.maps.MapFragment.
If you would like to make your application compatible with older devices, then you’ll have to use the Android Support Library and reference SupportMapFragment instead of MapFragment. The below example uses the Android Support Library.

The activity_main.xml layout:

<fragment xmlns:android="http://schemas.android.com/apk/res/android"
    android:id="@+id/maps_fragment"
    android:layout_width="match_parent"
    android:layout_height="match_parent"
    android:name="com.google.android.gms.maps.SupportMapFragment" />

and the MainActivity.java:

public class MainActivity extends FragmentActivity {

	@Override
	protected void onCreate(Bundle savedInstanceState) {
		super.onCreate(savedInstanceState);
		setContentView(R.layout.activity_main);
	}
}

If everything was configured correctly, then when running this example you should see a map.

Full source code can be downloaded from GitHub: https://github.com/vgrec/MapsV2Example

ViewPager with Tabs inside SlidingMenu

This started as a question on StackOverflow on how to have tabs inside the SlidingMenu.

Though I would opt for another design decision, for example to put the content of the tabs in separate activities, and then instead of having 3 tabs at the bottom inside the sliding menu, have 3 options menu that will redirect to specific activities, I took this design as a challenge and below is the result:

homescreen

I order to achieve this, PagerSlidingTabStrip in conjuction with ViewPager was used.

I did not include the ActionBarSherlock, as the question on StackOverflow suggested, but if needed that will be easy to integrate: the MainActivity will be required to extend from SherlockFragmentActivity, and the theme @style/Theme.Sherlock.Light added to manifest file, and that is all.

Here are the steps I took to integrate PagerSlidingTabStrip and ViewPager with SlidingMenu:

1 – Add SlidingMenu library to your project
2 – Add PagerSlidingTabStrip library
3 – Add Android Support Library (and copy the same .jar into SlidingMenu and PagerSlidingTabString libraries, otherwise eclipse might complain that the versions of .jar do not match)
4 – A minimal example of MainActivity:

public class MainActivity extends FragmentActivity  {

    @Override
    protected void onCreate(Bundle savedInstanceState) {
        super.onCreate(savedInstanceState);
        setContentView(R.layout.main);

        SlidingMenu menu = new SlidingMenu(this);
        menu.setTouchModeAbove(SlidingMenu.TOUCHMODE_FULLSCREEN);
        menu.setBehindOffset(50);
        menu.setFadeDegree(0.35f);
        menu.attachToActivity(this, SlidingMenu.SLIDING_CONTENT);
        menu.setMenu(R.layout.left_menu);

        ViewPager pager = (ViewPager) findViewById(R.id.pager);
        pager.setAdapter(new ViewPagerAdapter(getSupportFragmentManager()));

        PagerSlidingTabStrip tabs = (PagerSlidingTabStrip) findViewById(R.id.tabs);
        tabs.setViewPager(pager);
    }
}

5 – The layout of sliding menu, R.layout.left_menu:

<?xml version="1.0" encoding="utf-8"?>
<RelativeLayout xmlns:android="http://schemas.android.com/apk/res/android"
    android:id="@+id/left_menu"
    android:layout_width="match_parent"
    android:layout_height="match_parent"
    android:background="#CCC"
    android:orientation="vertical" xmlns:app="http://schemas.android.com/apk/res/org.grec">

    <com.astuetz.viewpager.extensions.PagerSlidingTabStrip
        android:id="@+id/tabs"
        app:shouldExpand="true"
        android:layout_width="match_parent"
        android:layout_alignParentBottom="true"
        android:layout_height="48dip" />

    <android.support.v4.view.ViewPager
        android:id="@+id/pager"
        android:layout_width="match_parent"
        android:layout_height="match_parent"
        android:layout_above="@id/tabs" />

</RelativeLayout>

6 – The ViewPagerAdapter:

public class ViewPagerAdapter extends FragmentStatePagerAdapter {

    private final int PAGES = 3;
    private String[] titles={"Tab 1", "Tab 2", "Tab 3"};

    public ViewPagerAdapter(FragmentManager fm) {
        super(fm);
    }

    @Override
    public Fragment getItem(int position) {
        switch (position) {
            case 0:
                return new TabFragment1();
            case 1:
                return new TabFragment2();
            case 2:
                return new TabFragment3();
            default:
                throw new IllegalArgumentException("The item position should be less or equal to:" + PAGES);
        }
    }

    @Override
    public CharSequence getPageTitle(int position) {
        return titles[position];
    }

    @Override
    public int getCount() {
        return PAGES;
    }
}

7 – And an example of fragment, TabFragment1.java (the other 2 are similar):

public class TabFragment1 extends Fragment {
    @Override
    public View onCreateView(LayoutInflater inflater, ViewGroup container,
            Bundle savedInstanceState) {
        return inflater.inflate(R.layout.fragment_tab_1, container, false);
    }
}

8 – And the layout of the fragment R.layout.fragment_tab_1 which simply displays a TextView:

<?xml version="1.0" encoding="utf-8"?>
<RelativeLayout xmlns:android="http://schemas.android.com/apk/res/android"
    android:layout_width="match_parent"
    android:layout_height="match_parent" >
 
    <TextView
        android:textColor="#000"
        android:layout_width="wrap_content"
        android:layout_height="wrap_content"
        android:text="Fragment tab 1" />
 
</RelativeLayout>

For full source code visit: https://github.com/vgrec/SlidingMenuWithViewpager

Example using ViewPager with ActionBarSherlock tabs

In this post I’m going to show you an example usage of ViewPager in conjunction with ActionBarSherlock tabs.
The final result should look like this:

ActionBar with ViewPager

1. Add the ActionBarSherlock library to your project. (Here’s a short tutorial on how to integrate ABS with a project, in case you need a refresh on this)

2. Change the AndroidManifest file of your project to use one of the predefined themes by ABS:

<application       
        //....
        android:theme="@style/Theme.Sherlock.Light" >
        //.....
</application>

Note that using ActionBarSherlock requires you to use one of these themes: Theme.Sherlock, Theme.Sherlock.Light, Theme.Sherlock.Light.DarkActionBar, or any other derivate, otherwise a RuntimeException exception will be thrown.

3. Create the MainActivity.java:

public class MainActivity extends SherlockFragmentActivity {

	private ActionBar actionBar;
	private ViewPager viewPager;

	@Override
	protected void onCreate(Bundle savedInstanceState) {
		super.onCreate(savedInstanceState);
		setContentView(R.layout.activity_main);

		viewPager = (ViewPager) findViewById(R.id.pager);
		viewPager.setOnPageChangeListener(onPageChangeListener);
		viewPager.setAdapter(new ViewPagerAdapter(getSupportFragmentManager()));
		addActionBarTabs();
	}

	private ViewPager.SimpleOnPageChangeListener onPageChangeListener = new ViewPager.SimpleOnPageChangeListener() {
		@Override
		public void onPageSelected(int position) {
			super.onPageSelected(position);
			actionBar.setSelectedNavigationItem(position);
		}
	};

	private void addActionBarTabs() {
		actionBar = getSupportActionBar();
		String[] tabs = { "Tab 1", "Tab 2", "Tab 3" };
		for (String tabTitle : tabs) {
			ActionBar.Tab tab = actionBar.newTab().setText(tabTitle)
					.setTabListener(tabListener);
			actionBar.addTab(tab);
		}
		actionBar.setNavigationMode(ActionBar.NAVIGATION_MODE_TABS);
	}

	private ActionBar.TabListener tabListener = new ActionBar.TabListener() {
		@Override
		public void onTabSelected(ActionBar.Tab tab, FragmentTransaction ft) {
			viewPager.setCurrentItem(tab.getPosition());
		}

		@Override
		public void onTabUnselected(ActionBar.Tab tab, FragmentTransaction ft) {
		}

		@Override
		public void onTabReselected(ActionBar.Tab tab, FragmentTransaction ft) {
		}
	};
}

Another requirement in order to use Sherlock library is that your activity should extend from SherlockFragmentActivity, and this is what MainActivity does first.
Then it takes a reference to the ViewPager and sets the OnPageChangedListener and the PagerAdapter (implementation will be shown below):

viewPager = (ViewPager) findViewById(R.id.pager);
viewPager.setOnPageChangeListener(onPageChangeListener);
viewPager.setAdapter(new ViewPagerAdapter(getSupportFragmentManager()));

In short, a ViewPager is a layout manager that allows you to swipe left and right through pages of data.
It needs to be supplied with an implementation of PagerAdapter in order to generate the pages that the view shows.

Just below the initialization of ViewPager the action bar tabs are added:

private void addActionBarTabs() {
	actionBar = getSupportActionBar();
	String[] tabs = { "Tab 1", "Tab 2", "Tab 3" };
	for (String tabTitle : tabs) {
		ActionBar.Tab tab = actionBar.newTab().setText(tabTitle)
				.setTabListener(tabListener);
		actionBar.addTab(tab);
	}
	actionBar.setNavigationMode(ActionBar.NAVIGATION_MODE_TABS);
}

For every string in the tabs[] array a new ActionBar.Tab is created and added to the ActionBar.

4. And the layout of MainActivity, R.layout.activity_main, which simply defines the ViewPager container.

<RelativeLayout xmlns:android="http://schemas.android.com/apk/res/android"
    android:layout_width="match_parent"
    android:layout_height="match_parent" >

    <android.support.v4.view.ViewPager
        android:id="@+id/pager"
        android:layout_width="match_parent"
        android:layout_height="match_parent" />

</RelativeLayout>

5. The implementation of ViewPagerAdapter.java:

public class ViewPagerAdapter extends FragmentStatePagerAdapter {

    private final int PAGES = 3;

    public ViewPagerAdapter(FragmentManager fm) {
        super(fm);
    }

    @Override
    public Fragment getItem(int position) {
        switch (position) {
            case 0:
                return new TabFragment1();
            case 1:
                return new TabFragment2();
            case 2:
                return new TabFragment3();
            default:
                throw new IllegalArgumentException("The item position should be less or equal to:" + PAGES);
        }
    }

    @Override
    public int getCount() {
        return PAGES;
    }
}

The PagerAdapter helps represent each page as a Fragment.
By extending FragmentStatePagerAdapter two methods should be overrided:
getCount() – which returns the total number of pages the ViewPager will have, and
getItem() – which returns a new fragment for each page.

6. Bellow follows the fragment classes used for representing each page. The minimalistic implementation is to extend from SherlockFragment, and provide a view for the fragment itself.
TabFragment1.java:

public class TabFragment1 extends SherlockFragment {

	@Override
	public View onCreateView(LayoutInflater inflater, ViewGroup container,
			Bundle savedInstanceState) {
		return inflater.inflate(R.layout.fragment_tab_1, container, false);
	}
}

TabFragment2.java:

public class TabFragment2 extends SherlockFragment {

	@Override
	public View onCreateView(LayoutInflater inflater, ViewGroup container,
			Bundle savedInstanceState) {
		return inflater.inflate(R.layout.fragment_tab_2, container, false);
	}
}

TabFragment3.java:

public class TabFragment3 extends SherlockFragment {
	
	@Override
	public View onCreateView(LayoutInflater inflater, ViewGroup container,
			Bundle savedInstanceState) {
		return inflater.inflate(R.layout.fragment_tab_3, container, false);
	}
}

7. And their corresponding layout files, which in this particular example have just a single TextView element.
fragment_tab_1.xml:

<RelativeLayout xmlns:android="http://schemas.android.com/apk/res/android"
    android:layout_width="match_parent"
    android:layout_height="match_parent" >

    <TextView
        android:layout_width="wrap_content"
        android:layout_height="wrap_content"
        android:text="Fragment tab 1" />

</RelativeLayout>

fragment_tab_2.xml:

<RelativeLayout xmlns:android="http://schemas.android.com/apk/res/android"
    android:layout_width="match_parent"
    android:layout_height="match_parent" >

    <TextView
        android:layout_width="wrap_content"
        android:layout_height="wrap_content"
        android:text="Fragment tab 2" />

</RelativeLayout>

fragment_tab_3.xml:

<RelativeLayout xmlns:android="http://schemas.android.com/apk/res/android"
    android:layout_width="match_parent"
    android:layout_height="match_parent" >

    <TextView
        android:layout_width="wrap_content"
        android:layout_height="wrap_content"
        android:text="Fragment tab 3" />

</RelativeLayout>

Full project can be found on github: https://github.com/vgrec/SherlockActionBarTabs