Amazing Cracked Screen

Hello everyone,

In this weekend I made a simple application just for fun – Amazing  Cracked Screen, the main purpose being to trick your friends and make fun of them! Basically, what does the application is to simulate a broken phone screen.
The application includes 6 different broken screens, and provides the ability to set up a delay time when the app should start, so you can manage to give the phone to your friend.

Just start the application, select the desired broken screen and have fun!


Amazing Cracked Screen

How to create popups in Android

In this post I’ll show you how to create a popup window in Android. A popup window can be used to display an arbitrary view, and it can be very convenient in cases when you want to display an additional information, but don’t want or it’s not appropriate to launch a new activity or  display a dialog.

The final output should look like this:

Android Popup

We will use the PopupWindow class to create the popup.

One thing I would like to mention is that we want the popup to be attached to the button that opened it. For example if the “Show Popup” button from the screenshot above would be positioned in the middle of the screen, we want the popup window stick to the button’s position. To achieve this, first we should get the button’s “x” and “y” position on the screen, and pass them to the popup window. Then will we use an offset to align the popup properly – a bit to the right, and a bit down, so it won’t overlap the whole button.

Another think I would like to mention is that we will use a 9 patch background image for the popup, so it will look more fancy. But of course you can skip it and put any background you want, or no background at all.

9 patch image:

9 patch image

Put the image into res/drawable directory.


1. Create a new project in Eclipse:
Project: TestPopup
Activity: TestPopupActivity

2. Open layout/main.xml file and add a button


<?xml version="1.0" encoding="utf-8"?>
<LinearLayout xmlns:android="http://schemas.android.com/apk/res/android"
android:layout_width="fill_parent"
android:layout_height="fill_parent"
android:background="#CCC"
android:orientation="vertical" >

<Button
   android:id="@+id/show_popup"
   android:layout_width="wrap_content"
   android:layout_height="wrap_content"
   android:text="Show Popup" />

</LinearLayout>

3. Create a new layout file: layout/popup_layout.xml that defines the layout of popup.


<?xml version="1.0" encoding="utf-8"?>
<LinearLayout xmlns:android="http://schemas.android.com/apk/res/android"
   android:layout_width="wrap_content"
   android:id="@+id/popup"
   android:layout_height="wrap_content"
   android:background="@drawable/popup_bg"
   android:orientation="vertical" >

<TextView
   android:id="@+id/textView1"
   android:layout_width="wrap_content"
   android:layout_height="wrap_content"
   android:text="Popup"
   android:textAppearance="?android:attr/textAppearanceLarge" />

<TextView
   android:id="@+id/textView2"
   android:layout_marginTop="5dp"
   android:layout_width="wrap_content"
   android:layout_height="wrap_content"
   android:text="This is a simple popup" />

<Button
   android:id="@+id/close"
   android:layout_marginTop="10dp"
   android:layout_gravity="center_horizontal"
   android:layout_width="wrap_content"
   android:layout_height="wrap_content"
   android:text="Close" />

</LinearLayout>


4. And now the most interesting part. Open the TestPopupActivity and fill it with below code. Carefully read the comments to understand what’s going on.


public class TestPopupActivity extends Activity {

//The "x" and "y" position of the "Show Button" on screen.
Point p;

@Override
public void onCreate(Bundle savedInstanceState) {
   super.onCreate(savedInstanceState);
   setContentView(R.layout.main);

   Button btn_show = (Button) findViewById(R.id.show_popup);
   btn_show.setOnClickListener(new OnClickListener() {
     @Override
     public void onClick(View arg0) {

       //Open popup window
       if (p != null)
       showPopup(TestPopupActivity.this, p);
     }
   });
}

// Get the x and y position after the button is draw on screen
// (It's important to note that we can't get the position in the onCreate(),
// because at that stage most probably the view isn't drawn yet, so it will return (0, 0))
@Override
public void onWindowFocusChanged(boolean hasFocus) {

   int[] location = new int[2];
   Button button = (Button) findViewById(R.id.show_popup);

   // Get the x, y location and store it in the location[] array
   // location[0] = x, location[1] = y.
   button.getLocationOnScreen(location);

   //Initialize the Point with x, and y positions
   p = new Point();
   p.x = location[0];
   p.y = location[1];
}

// The method that displays the popup.
private void showPopup(final Activity context, Point p) {
   int popupWidth = 200;
   int popupHeight = 150;

   // Inflate the popup_layout.xml
   LinearLayout viewGroup = (LinearLayout) context.findViewById(R.id.popup);
   LayoutInflater layoutInflater = (LayoutInflater) context
     .getSystemService(Context.LAYOUT_INFLATER_SERVICE);
   View layout = layoutInflater.inflate(R.layout.popup_layout, viewGroup);

   // Creating the PopupWindow
   final PopupWindow popup = new PopupWindow(context);
   popup.setContentView(layout);
   popup.setWidth(popupWidth);
   popup.setHeight(popupHeight);
   popup.setFocusable(true);

   // Some offset to align the popup a bit to the right, and a bit down, relative to button's position.
   int OFFSET_X = 30;
   int OFFSET_Y = 30;

   // Clear the default translucent background
   popup.setBackgroundDrawable(new BitmapDrawable());

   // Displaying the popup at the specified location, + offsets.
   popup.showAtLocation(layout, Gravity.NO_GRAVITY, p.x + OFFSET_X, p.y + OFFSET_Y);

   // Getting a reference to Close button, and close the popup when clicked.
   Button close = (Button) layout.findViewById(R.id.close);
   close.setOnClickListener(new OnClickListener() {

     @Override
     public void onClick(View v) {
       popup.dismiss();
     }
   });
}
}

Introducing “Even or Odd” – My First Android Game :)

Hello everyone,

I would like to introduce you the freshly cooked “Even or Odd” game, an addictive casual game for Android.

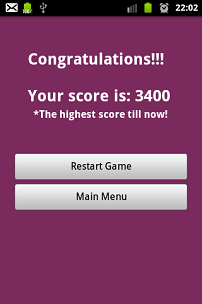
The idea of the game is pretty simple: you are given a series of numbers, and have 30 seconds at your disposal to answer if the given numbers are even or odd ones. Give a correct answer and you get +100 points, you give a wrong answer and you go down: -100 points. Try to give as many correct answers as you can in 30 sec.

This is my first attempt into this kind of Android apps. What was new from what I did previously, is that I made use of MediaPlayer to play sounds. Using MediaPlayer to play sounds will be the subject of another tutorial in the upcoming period of time. Stay tuned. 😉

Android Game Even or Odd


First Android Android Game


Give it a try and let me know your high score :).

9GAG Pictures Funny Images

Creating and Displaying a Custom Dialog in Android

In this post I would like to describe the process of creating and displaying a custom dialog. Though the Android documentation describes pretty well the topic, I faced some problems implementing it, and I would like to share my findings.

The final output should look like this:

Android Custom Dialog

1. The first issue I have encountered was that I was getting a BadTokenException in the onCreateDialog() method where I was instantiating the Dialog: android.view.WindowManager$BadTokenException: Unable to add window — token null is not for an application, 

Context context=getApplicationContext();
Dialog dialog=new Dialog(context);

Well, though the Android documentation suggests to use getApplicationContext(); actually it turns out that this is not the proper way to do it and most likely it will throw an exception. The correct way is to use this, or “ActivityName”.this instead of getApplicationContext(). For example:

Context context=MainActivity.this;
Dialog dialog=new Dialog(context);


2. The second issue I was facing was that I wanted to get rid off the standard dialog title.
Normally you would set the Dialog title with this:

dialog.setTitle("Dialog Title");

However, if you don’t want to display a standard title for your dialog, not calling the above line most probably won’t meet your expectations, because it will leave an empty space where the title should be.

Hopefully, this is an easy fix. Just call requestWindowFeature(Window.FEATURE_NO_TITLE); and you are done.

dialog.requestWindowFeature(Window.FEATURE_NO_TITLE);


To sum up with a concrete working example, below I presented an implementation of a simple custom dialog.

custom_dialog.xml:

<?xml version="1.0" encoding="utf-8"?>
<LinearLayout xmlns:android="http://schemas.android.com/apk/res/android"
   android:layout_width="250dp"
   android:layout_height="match_parent"
   android:background="#8F1A3B"
   android:orientation="vertical" >

<TextView
   android:layout_width="fill_parent"
   android:layout_height="wrap_content"
   android:layout_marginBottom="20dp"
   android:text="Custom Dialog"
   android:textSize="18dp" />

<Button
   android:id="@+id/restart"
   android:layout_width="fill_parent"
   android:layout_height="wrap_content"
   android:text="Restart Game" />

</LinearLayout>


MainActivity:


public class MainActivity extends Activity {

Dialog dialog;
int DIALOG_GAME_RESTART=100;

@Override
public void onCreate(Bundle savedInstanceState) {
   // ............
}

@Override
protected Dialog onCreateDialog(int id) {
   switch (id) {
   case DIALOG_GAME_RESTART:
     Context context=MainActivity.this;
     dialog=new Dialog(context);
     dialog.requestWindowFeature(Window.FEATURE_NO_TITLE);

     dialog.setContentView(R.layout.custom_dialog);

     Button restart=(Button)dialog.findViewById(R.id.restart);

     restart.setOnClickListener(new OnClickListener() {
     @Override
     public void onClick(View v) {
        dialog.dismiss();

        //whatever code you want to execute on restart
     }
     });
   break;

   default: break;
   }
   return dialog;
}
}

ITMoldova – My First Android Application.

Although it has passed awhile since I published my first android application on Google Play, and I published already my second Android App meanwhile, I decided to write about it as well, as almost all my posts from this blog till now are findings and experience gained while I was working on ITMoldova app.

ITMoldova.com is a Moldavian site that provides daily IT News for romanian speaking people. The main purpose of Android application is to check the RSS feed of the site if there are any new articles. If it turns out that new articles have been published on the site, then launch a status bar notification and notify the user. And of course, the user is able to see the most recent articles and read them right from his device.

The application settings provides the ability to set up the desired interval of time, when the application should verify the RSS feed, plus the possibility to Turn On or Off this feature.

ITMoldova Main

ITMoldova

I have some doubts in regards to how many of my readers and visitors of this blog understand Romanian language, but just in case, here’s the Google Play download link: 🙂

Get it on Google Play - ITMoldova

Do you want to build your own RSS Reader Application?

Here are the topics that will help you achieve this:

Creating A Simple RSS Application in Android

Understanding AsyncTask – Once and Forever

How to verify an RSS Feed if New Articles have been published.

Working With Services – IntentService

Showing status bar notifications in Android

How to Create Android Menus

Writing and Reading from SharedPreferences

Detecting Internet Connection

Building a Custom Fancy ListView in Android

After reading (and exercising) the above tutorials, you should be able to build your own Cool RSS Application :).


Please visit the Android Tutorials page for more Android tutorials.

Writing and Reading from SharedPreferences

SharedPreferences class allows you to save and retrieve primitive data types in key-value pairs. The data saved using SharedPreferences will be available even after your application is killed. This capability makes SharedPreferences suitable in different situations when user settings needs to be saved for example, or store data that can be used in different activities.
The data types that can be saved are booleans, floats, ints, longs, and strings.

To get an instance of SharedPreferences use the getSharedPreferences(String, int) method. The method takes 2 parameters: the name of the preference settings and the mode. (0 or MODE_PRIVATE for the default operation, MODE_WORLD_READABLE and MODE_WORLD_WRITEABLE to control permissions)

To write values:

  1. Call edit() to get a SharedPreferences.Editor instance
  2. Add values with methods such as putInt() and putString().
  3. Call commit() to save values.

To read values use such methods as getString() and getInt() of SharedPreferences instance.

Here’s a simple usage of SharedPreferences class:


public class SharedPrefsActivity extends Activity {

  public static final String PREFS_NAME = "MyApp_Settings";

  @Override
  public void onCreate(Bundle savedInstanceState) {
     super.onCreate(savedInstanceState);
     setContentView(R.layout.main);

     SharedPreferences settings = getSharedPreferences(PREFS_NAME, MODE_PRIVATE);

     // Writing data to SharedPreferences
     Editor editor = settings.edit();
     editor.putString("key", "some value");
     editor.commit();

     // Reading from SharedPreferences
     String value = settings.getString("key", "");
     Log.d(TAG, value);
  }
}

Please visit the Android Tutorials page for more tutorials.